💬 “What if every WhatsApp message could be answered instantly, 24/7, with natural AI-generated replies?” Spoiler alert: You don’t need a developer team—just a few clicks in n8n, a Wassenger account, and OpenAI.
🤩 🤖 Wassenger is a complete API solution for WhatsApp. Sign up for a 7-day free trial and get started in minutes!
Requirements
- n8n: v1.70 or later
- Wassenger account: Sign up for free to get API access
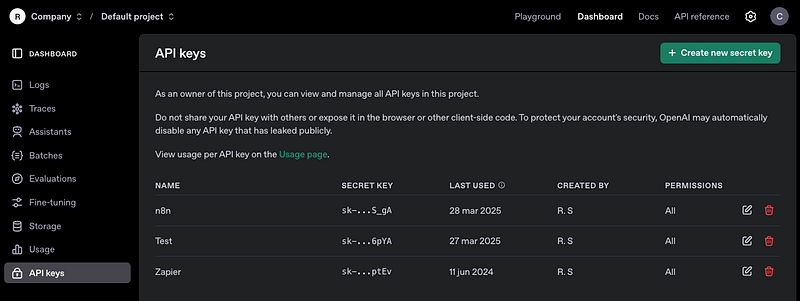
- API Key: obtain your API key here
- WhatsApp number: At least one WhatsApp number connected to Wassenger
- OpenAI API credentials: you can get them from here
Important! 💬 If you’re new to using n8n with Wassenger, check out our setup guide to get started quickly.
Now, let’s create our new AI ChatBot! 🤖
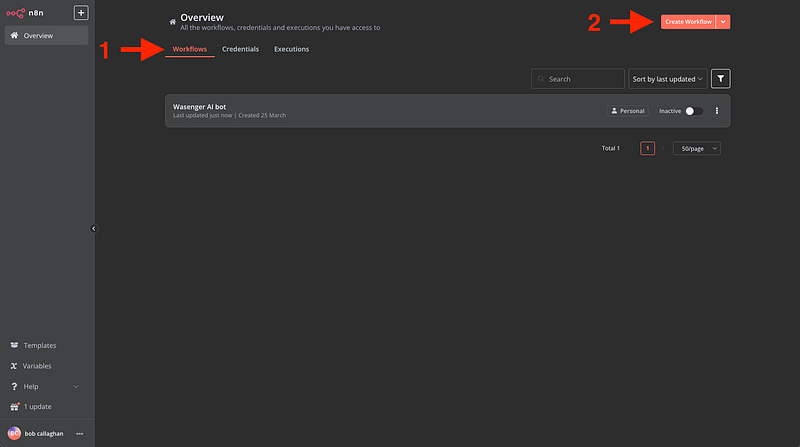
1. Create a new Workflow on n8n
Within the n8n interface, go to ‘Workflows’ and click ‘Create Workflow’
2. Connect the Wassenger Trigger
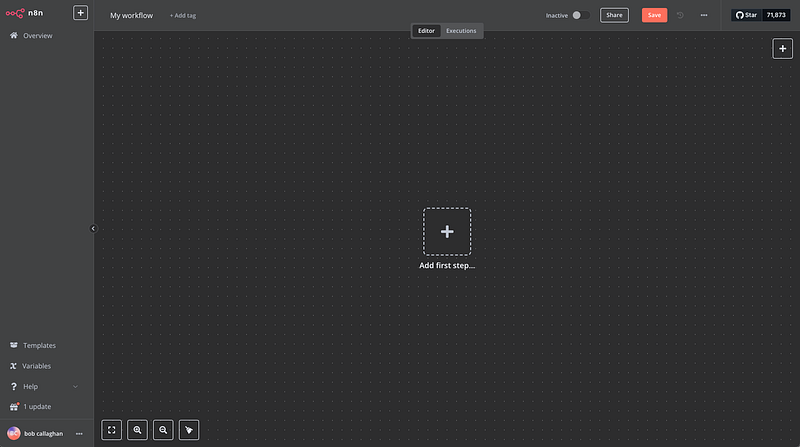
Okay, now that we are inside our new Workflow, we are going to create the connection with Wassenger in the following way:
Click on ‘Add first step’
Then search for “Wassenger”. Remember, you need to install the Wassenger node first. If you haven’t done it yet, check out our related article here.
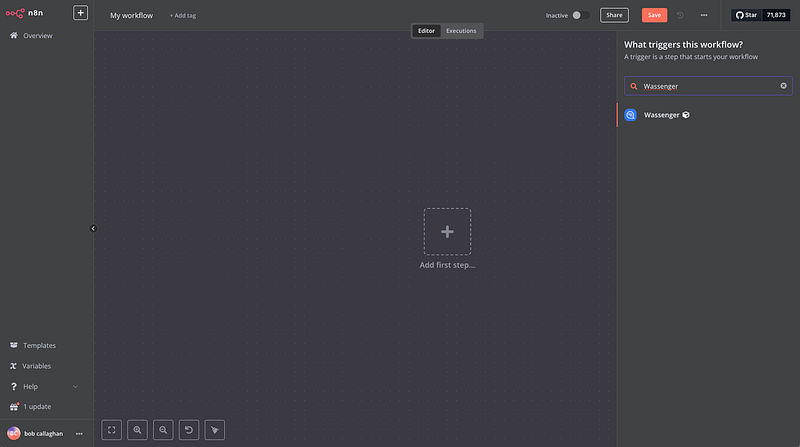
Then select the ‘On new inbound message received’ trigger
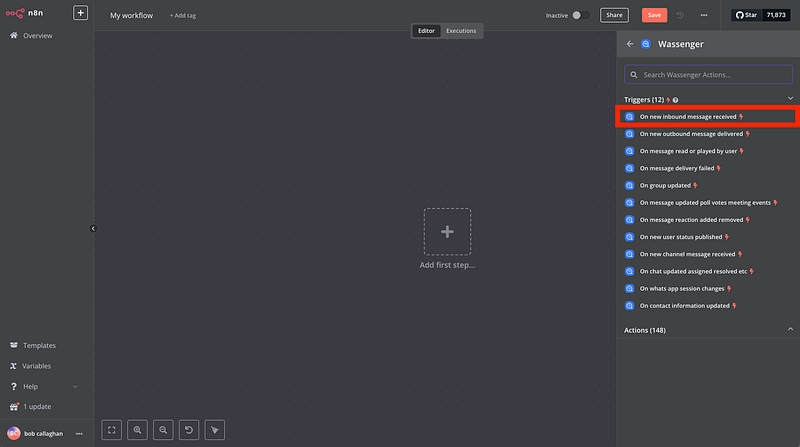
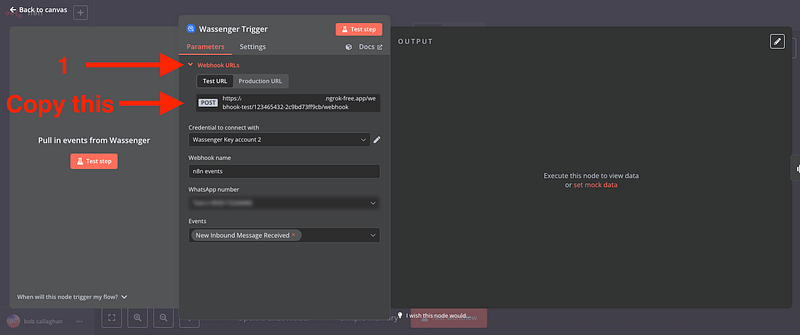
A window like this will open

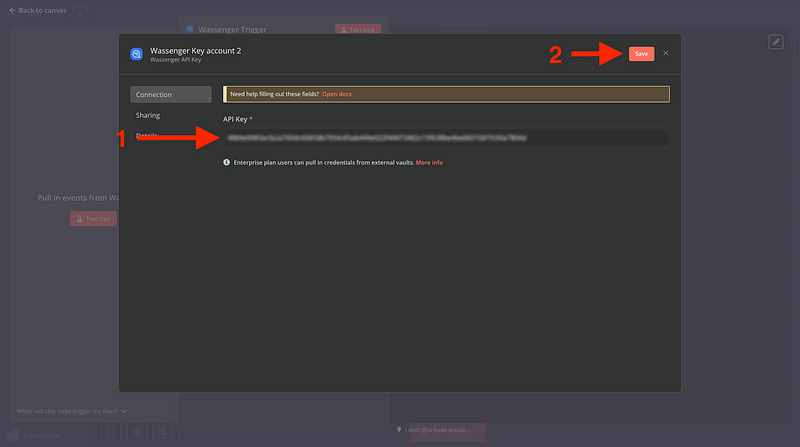
Now, we need to add our Wassenger API credentials to connect n8n with Wassenger:
- Go to the API key page in Wassenger and copy the given API key or create one

2. And copy it into the n8n trigger

🤩 🤖 Wassenger is a complete API solution for WhatsApp. Sign up for a 7-day free trial and get started in minutes!
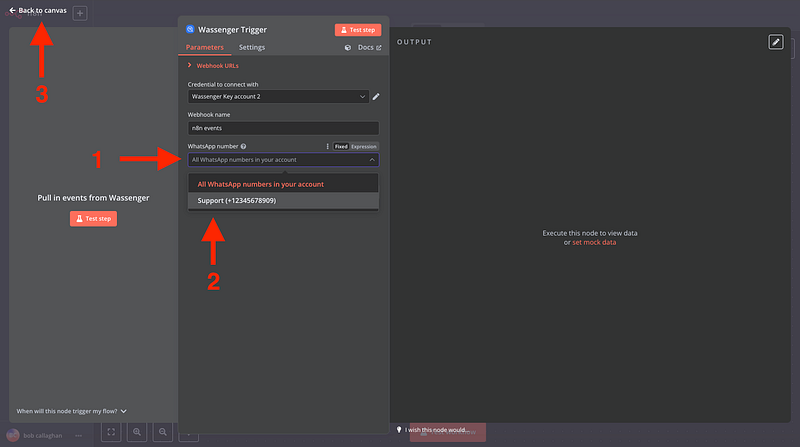
Then, select the connected WhatsApp number on Wassenger you want to trigger the event from and go back to your canvas
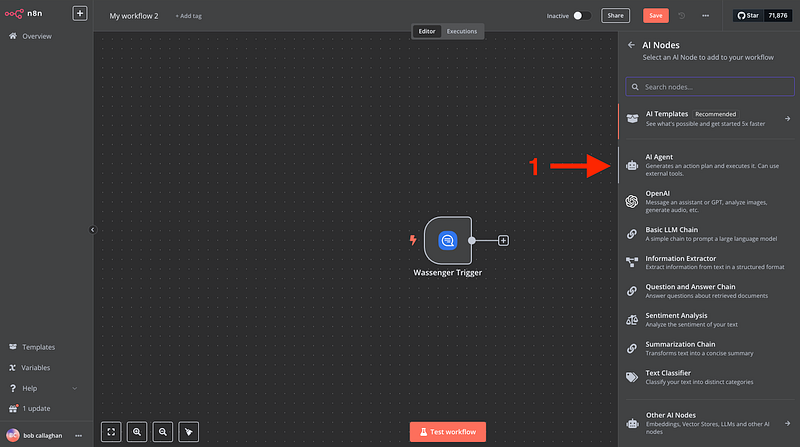
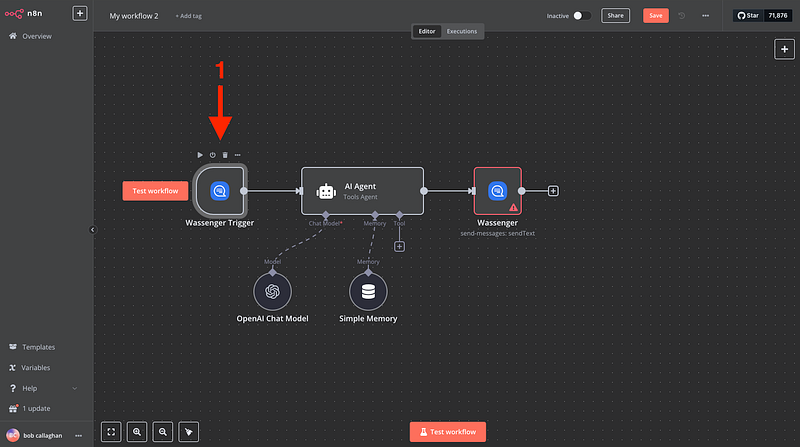
3. Connect the Advanced AI node
Now we need to connect the node that will allow us to build autonomous agents, summarize or search documents
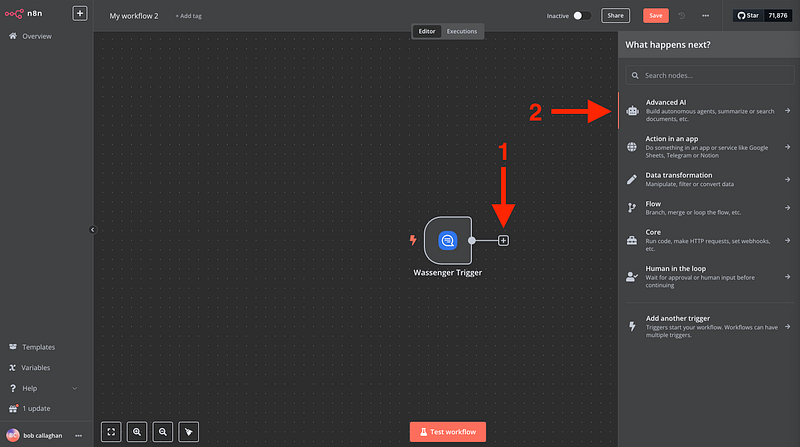
Next
And a window like this will show up
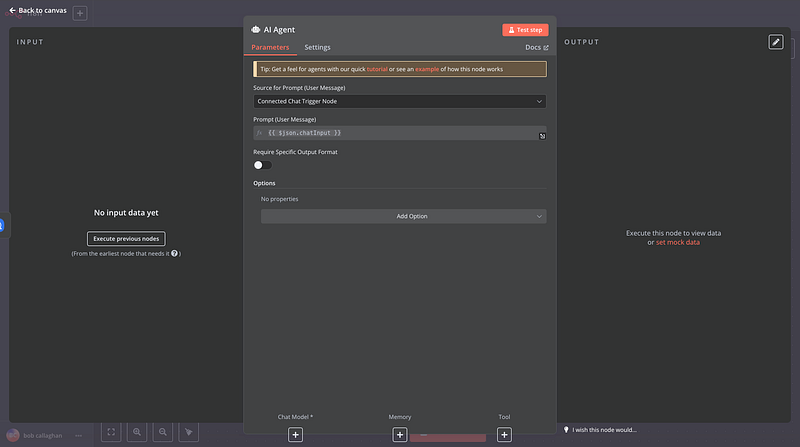
We will leave this for now to get back to our canvas to add our Open AI node, where the magic happens!
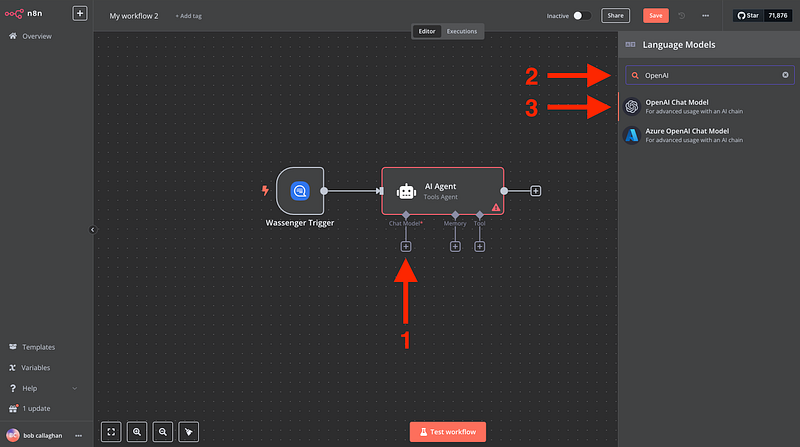
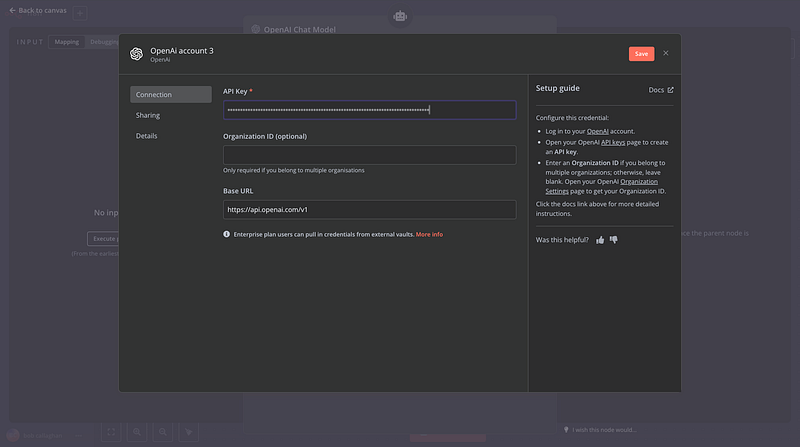
4. Connect the OpenAI chat Model
A window like this will open, and we will insert our OpenAI credentials
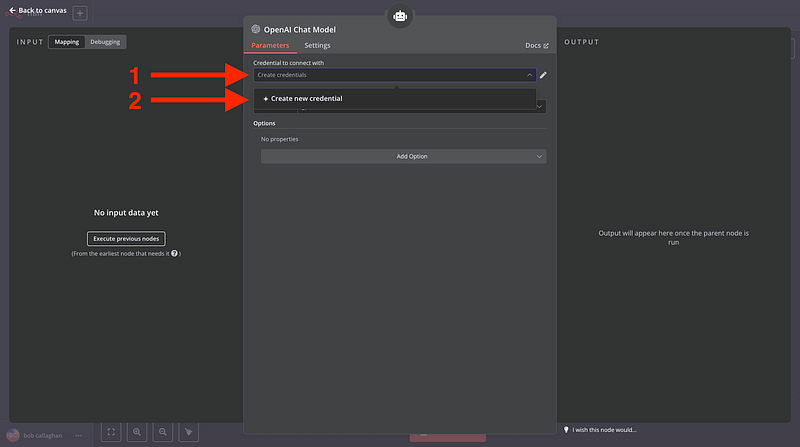
Create an OpenAI account and find your credentials here
Then add it to n8n
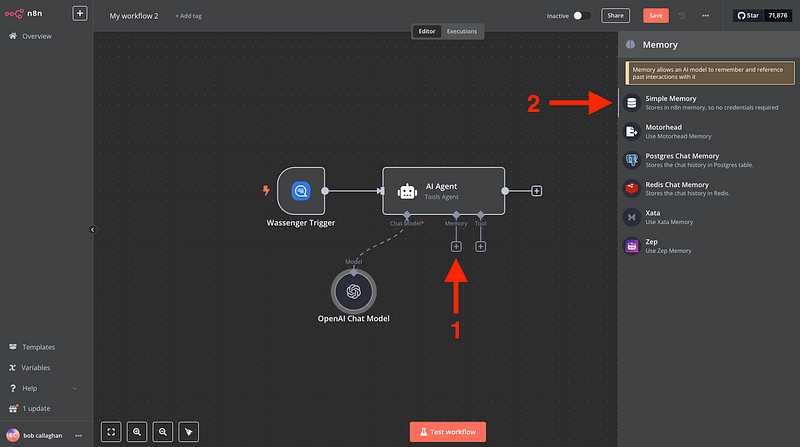
5. Add the memory node
The Memory node allows an AI model to remember and reference past interactions with it, and no credentials are required since it is stored within n8n
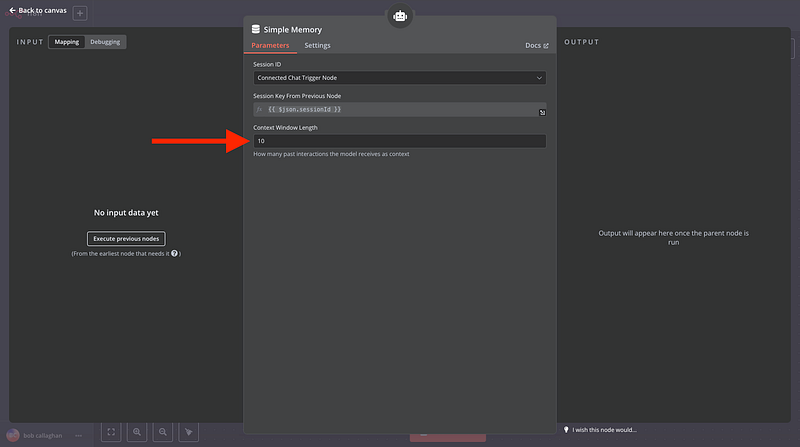
Extend the ‘Context Window Length’ to 10
🤩 🤖 Wassenger is a complete API solution for WhatsApp. Sign up for a 7-day free trial and get started in minutes!
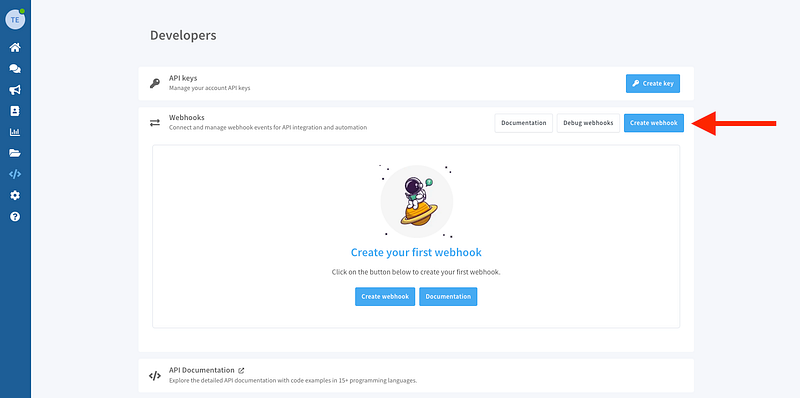
6. Connect your Wassenger Webhook to n8n
Now, for n8n to receive all message notifications when a contact texts you, we need to set up a new webhook
- Go to the Webhooks page here
- Create a new Webhook
Then

- Name your webhook
- Add the webhook URL that you will find in the first node we created in n8n
3. Select the number you want to transfer messages from
4. Select the event message:in:new
5. Save your new Webhook in Wassenger
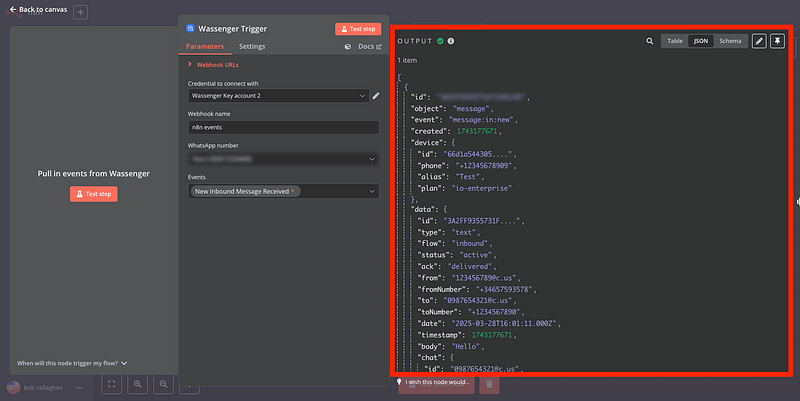
7. Test your first message
Now, we will click on ‘Test step’ on n8n to retrieve the given data from Wassenger and complete the whole process for the automatization:
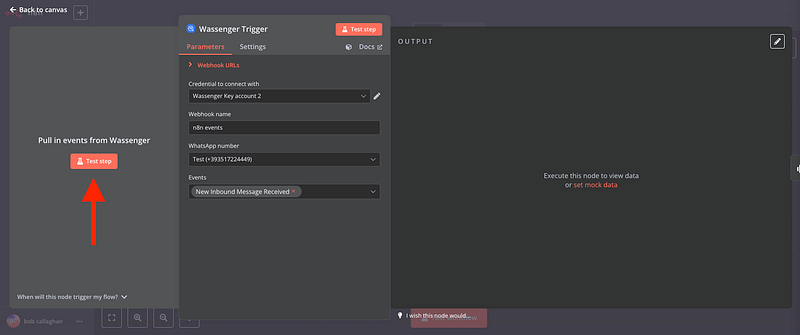
After that, you can try sending a message to your WhatsApp number from another available number.

Then your n8n node will receive your message and contact information that we will use to configure the rest of the workflow
🤩 🤖 Wassenger is a complete API solution for WhatsApp. Sign up for a 7-day free trial and get started in minutes!
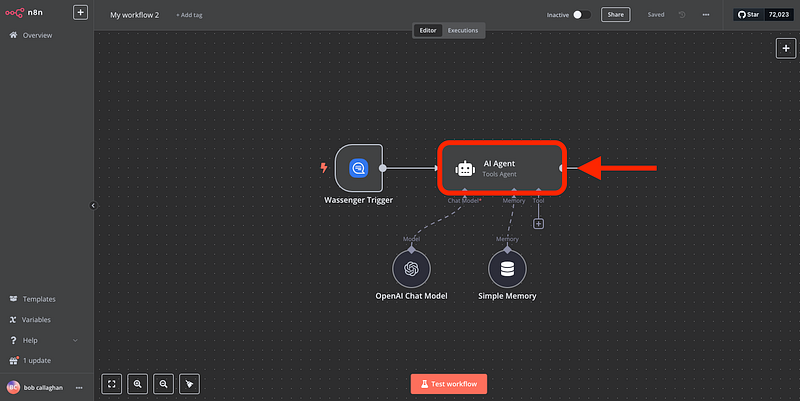
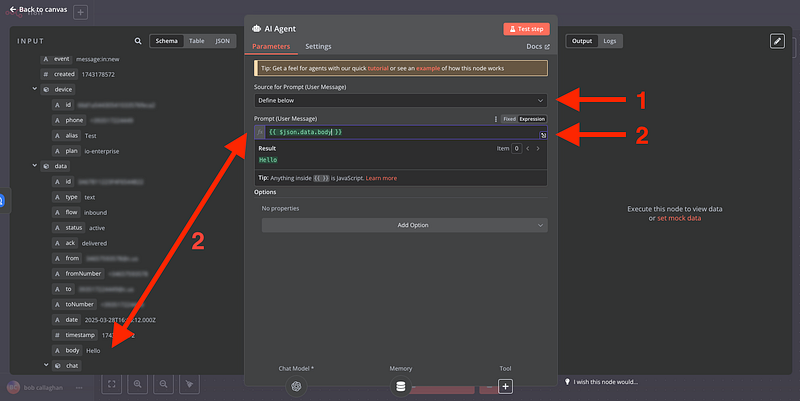
8. Configure the AI Agent with the dynamic retrieved data
Open the AI Agent node we added previously
Then
- Select the Source for Prompt (User Message) as Define Below
- Use the ‘body’ field to reference the incoming message within the Prompt so that n8n always references the correct data. (Drag the element onto the input.)
If you can’t see the data tree, click ‘Execute previous nodes’ and send a new message to your WhatsApp number.
Now that we have completed our AI agent configuration, let’s see the Memory node
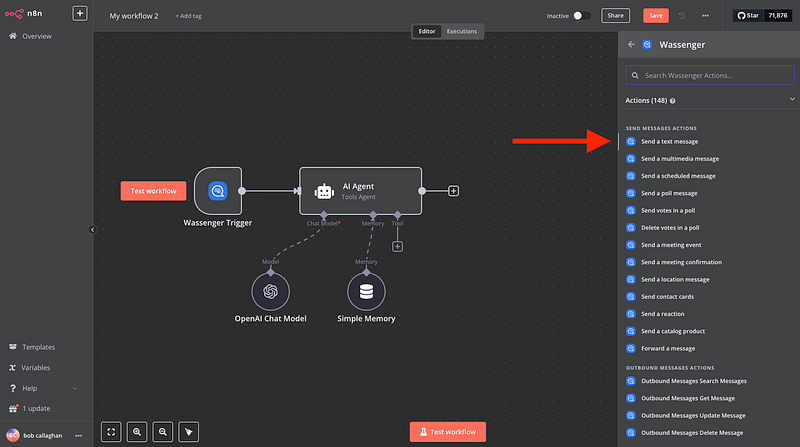
9. Add the Wassenger Message Response Node
Now, we will add the node that will send the AI-created message to your end WhatsApp customers
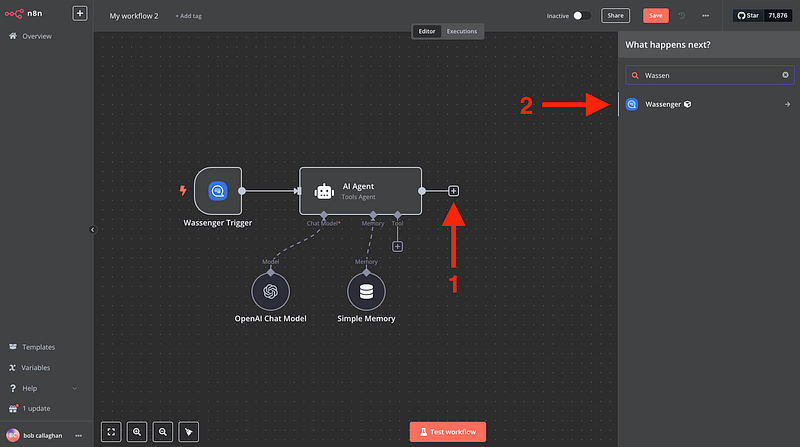
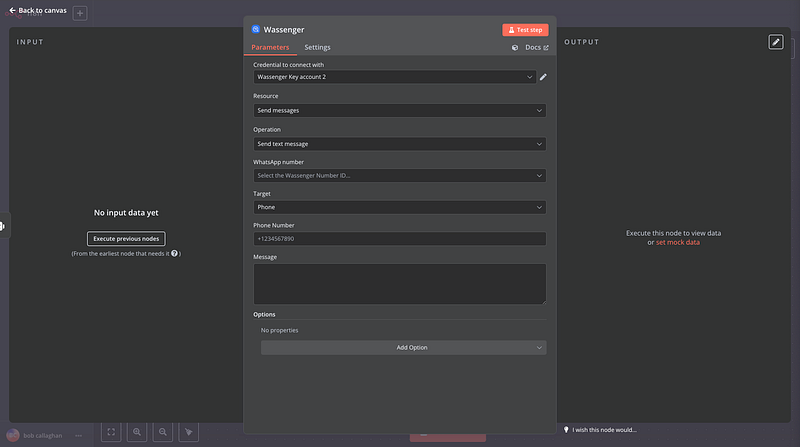
Select ‘Send a Text Message’
And a window like this will show up
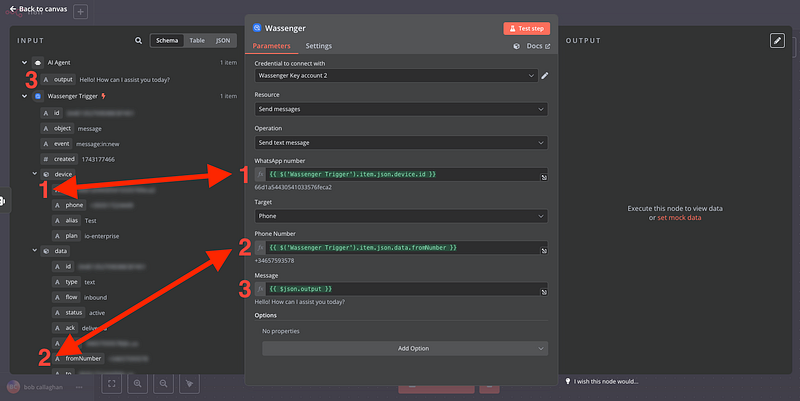
Then, we can click on ‘Execute previous nodes’** to show the message information again and proceed as follows
- Select the number ID provided by Wassenger to determine the number used to send the AI response
- The target phone number we are sending the AI-generated response
- The output message generated by our OpenAI node, based on the question we received from the customer
🎉 You’re All Set to Launch Your AI ChatBot!
Now that everything’s in place, you can see your chatbot in action. For example:
👤 Customer sends a message
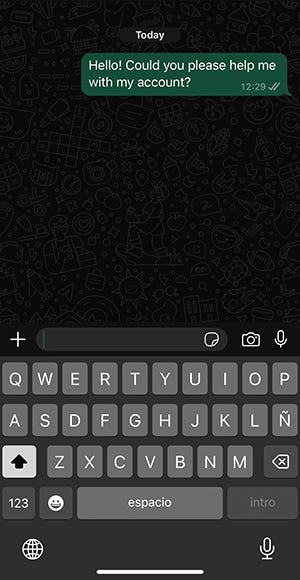
🤖 n8n processes it and replies instantly using AI

Check out more visual content of how the workflow should behave
From here, you can continue building smarter, more personalized automations. Whether it’s handling FAQs, guiding users, or providing 24/7 support, the possibilities are endless.
🚀 Ready to bring your WhatsApp communication to the next level? 🤩 🤖 Wassenger is your complete API solution for WhatsApp. 👉 Start your 7-day free trial today and get up and running in minutes!