Today, we will show you how to automatically reply to your customers on WhatsApp using Wassenger and Make (formerly Integromat).

🤩 🤖 Wassenger is a complete communication platform and API solution for WhatsApp. Explore more than 100+ API use cases and automate anything on WhatsApp by signing up for a free trial and getting started in minutes!
Requirements
- A Wassenger account, sign up here and obtain the API key
- A Make/Integromat account: sign up here
- Install the Make/Integromat app for Wassenger: install the app
Let’s continue with the steps below.
Step 1: Install Wassenger within Make/Integromat
After receiving the invitation link, click it and log into your Integromat account.
Once logged in, you can easily install Wassenger by clicking here, making it readily available in your account.
You will confirm the application is installed by checking in the Menu installed Apps section

Now that the application is installed, let’s create a new scenario.
🤩 🤖 Wassenger is a complete API solution for WhatsApp. Sign up for a 7-day free trial and get started in minutes!
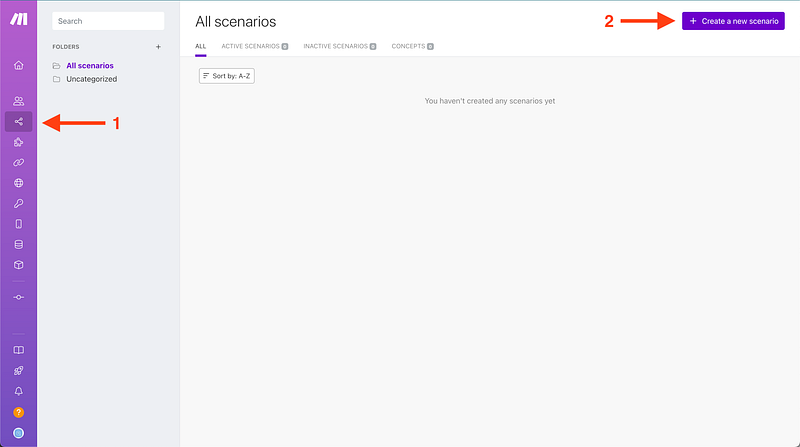
Step 2: Create a new scenario in Make to communicate with Wassenger
Now, we need to create a new scenario from the Make app.
- Go to Scenarios > Create a new scenario
Next, we will create a custom webhook connection
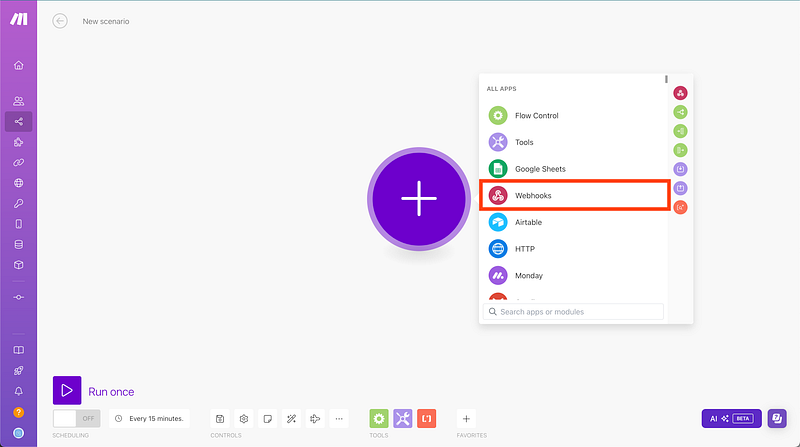
And then,

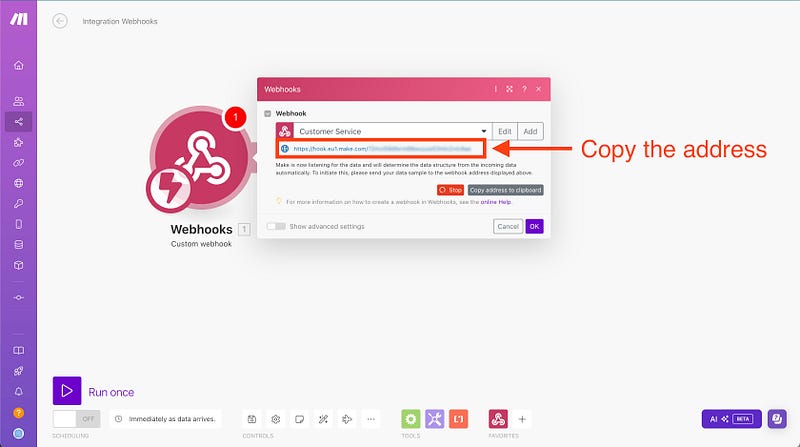
Following we will name our Webhook
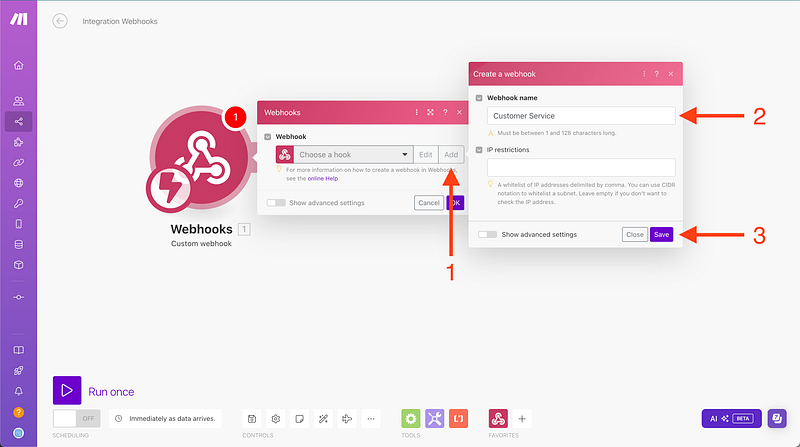
After pressing save, a new HTTPS address will be displayed and we will copy it
🤩 🤖 Wassenger is a complete API solution for WhatsApp. Sign up for a 7-day free trial and get started in minutes!
Step 3: Create a new webhook on Wassenger to register all the incoming messages from your customers
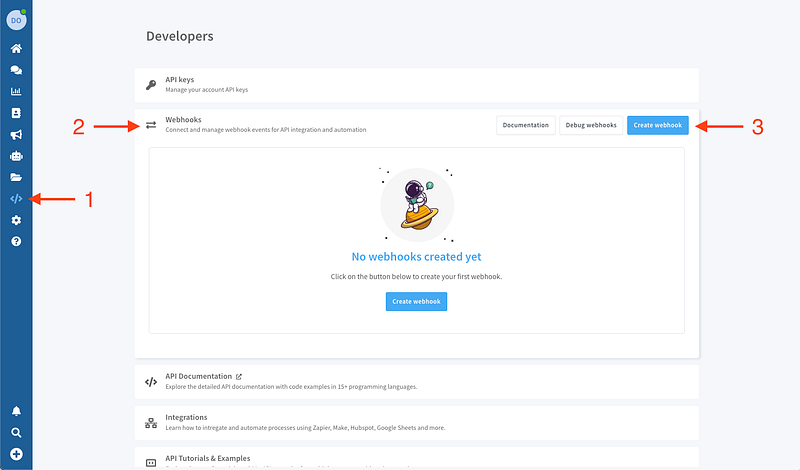
Now we need to open our Wassenger’s developers panel as shown in the image below: Left navbar > Developers > Webhooks > Create new webhook
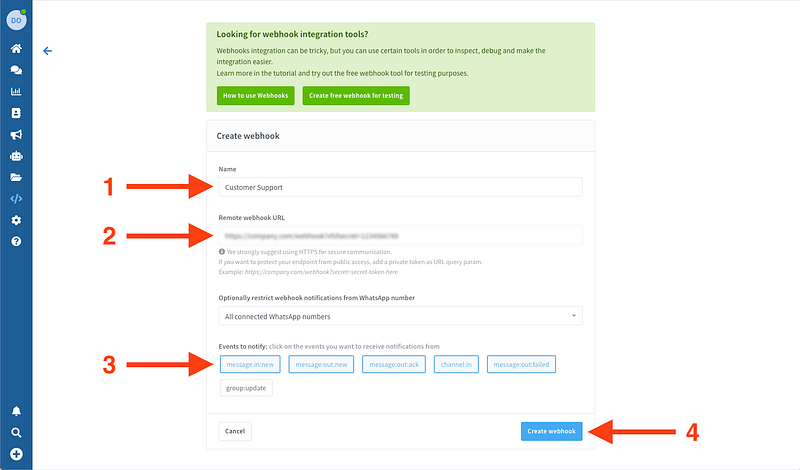
The next step is filling in the required information for your new webhook that we will later connect to Make.
🚀 For further information about webhooks and how they work. Visit our related article here.
- Name your new webhook
- Add the given Make HTTPS address we obtained before (For production integrations, it is required to use HTTPS instead of HTTP since communication would be end-to-end secure and encrypted.)
- Select the event you want to register
message:in:newmust be selected
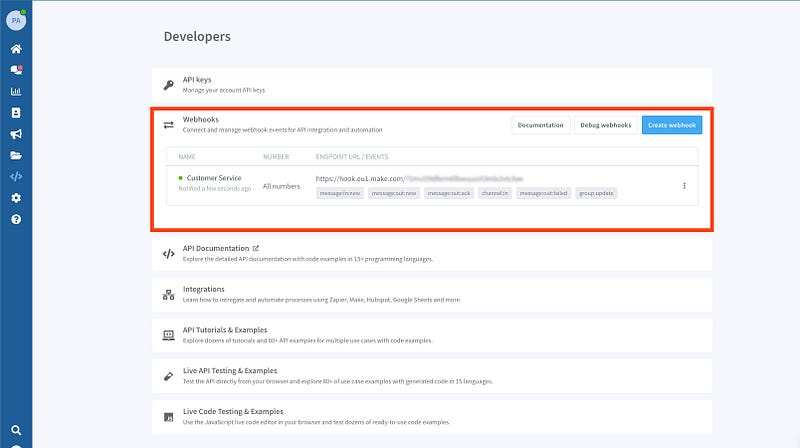
After creating our new Webhook on Wassenger, we will see something like this:
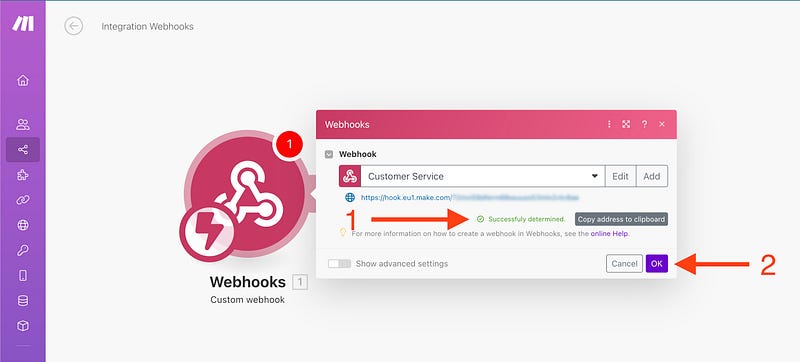
We will go back to our Make scenario to check if the connection was successful and then, press OK:
🤩 🤖 Wassenger is a complete API solution for WhatsApp. Sign up for a 7-day free trial and get started in minutes!
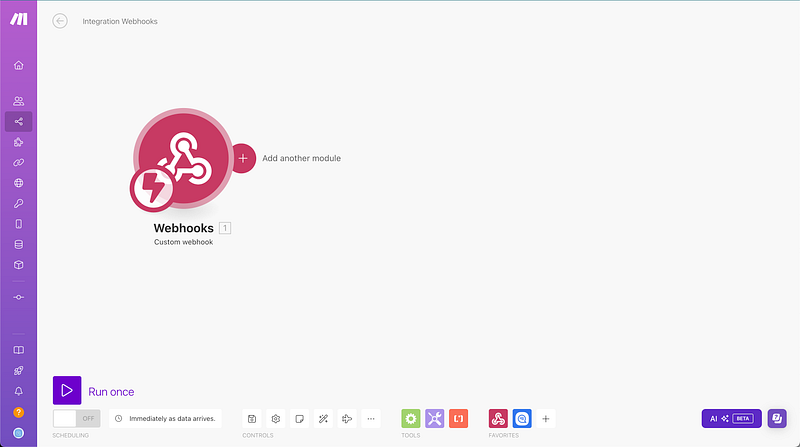
Step 4: Create a message trigger from Make to Wassenger using the webhook we just created
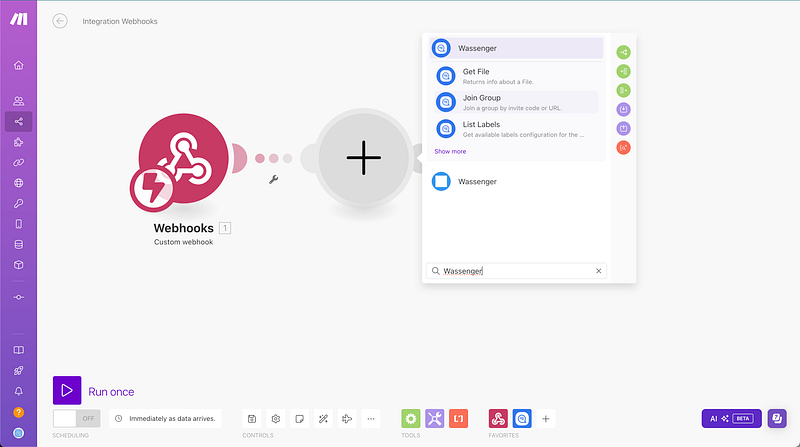
Now we are going to add a new module using the Wassenger app we installed previously
A new panel will show up. You can search by ‘Wassenger’ for a rapid find
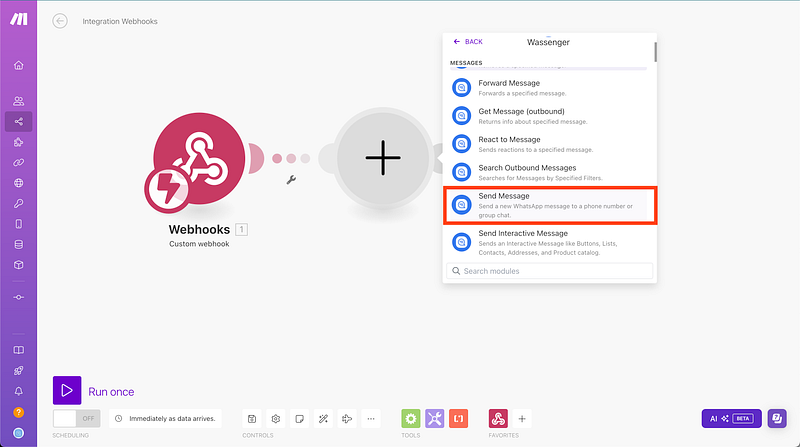
Then we will select Send Message
Afterwards, a new panel will show up where we will need to add our Wassenger API key
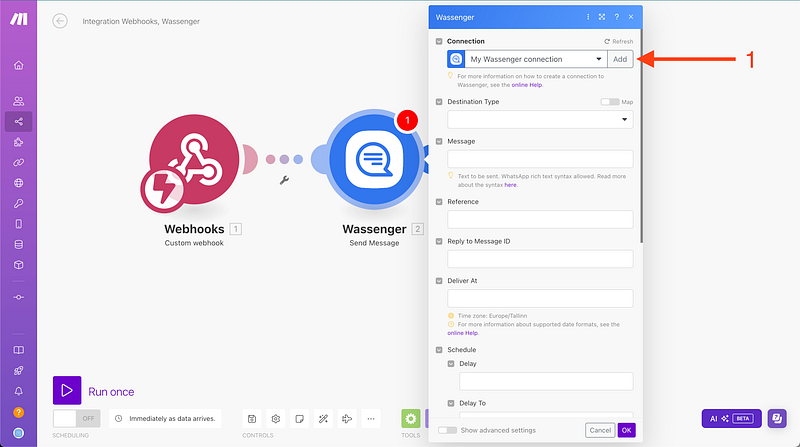
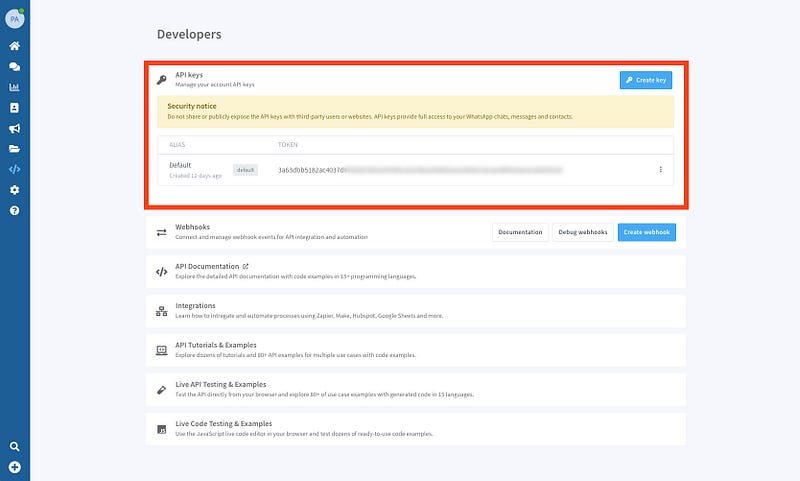
Then we will add the given Wassenger API key that you can find here
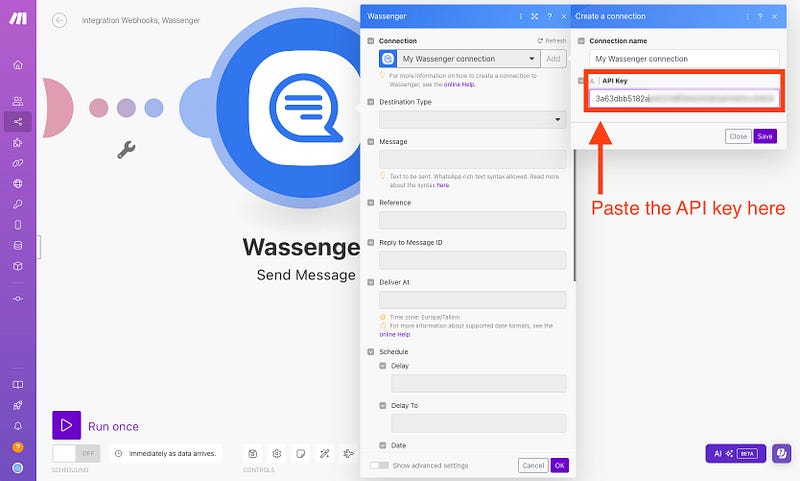
Paste the API key and click Save
Once you complete this, the connection will be ready to use. But first, we need to set up a few elements like Destinatary, Message, and more!
🤩 🤖 Wassenger is a complete API solution for WhatsApp. Sign up for a 7-day free trial and get started in minutes!
Step 5: Create the message response based on the given webhooks’ Wassenger data
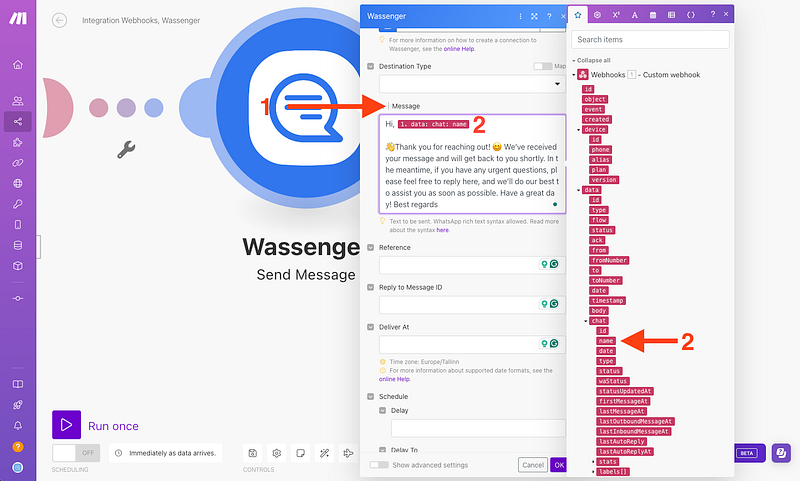
First, we need to define the message recipient that will come into the provided data as you can see in the image below:
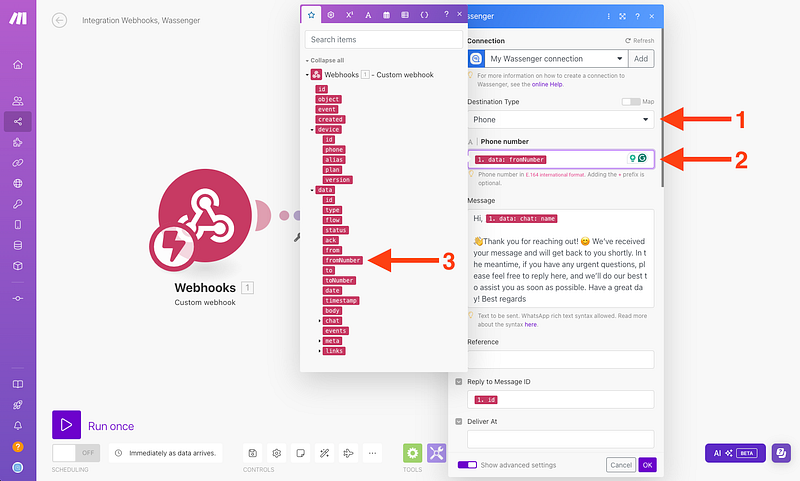
Next, we will define the message we want to send to our customers when they contact us. Optionally, to further personalize our customers’ experience, we can add a dynamic field within the message, such as the name of the customer who contacted us.
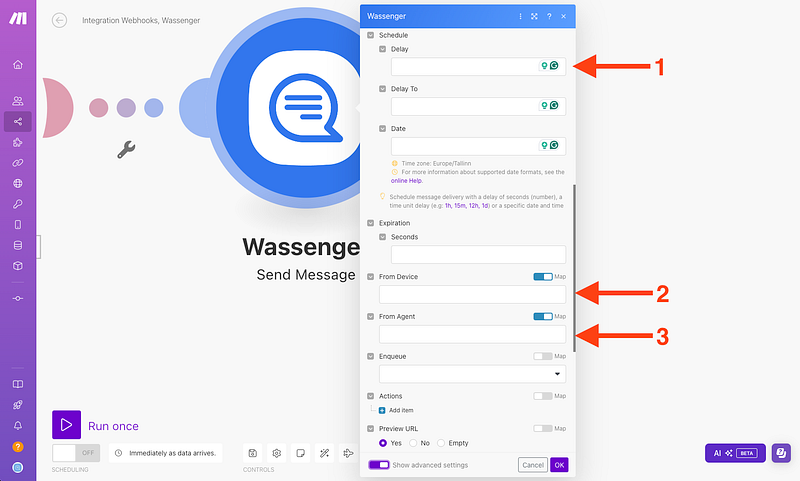
Finally, we have a variety of additional fields where we can add options, such as:
- Selecting a delay for sending the message.
- 2. If more than one number is connected in Wassenger, select which number we want to use to send the reply message.
- Select on behalf of which agent we want the message to appear as sent. If you’re not familiar with the platform, Wassenger allows you to have different members (agents) under the same number to interact with your customers, making the workload more manageable and your WhatsApp much more productive! 🙂
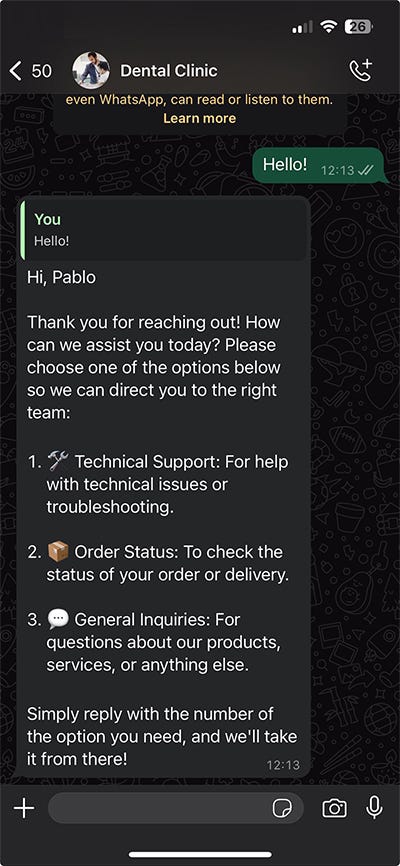
After completing all the steps correctly, it’s time to test our new message automation tool!
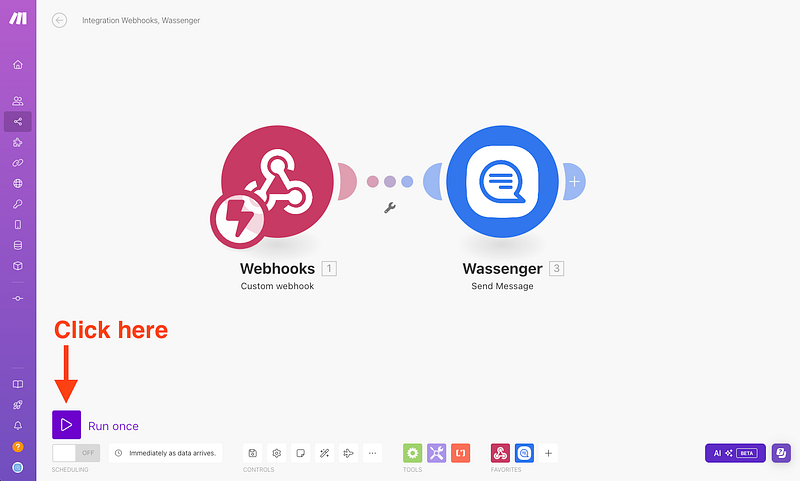
Here you can see how it works 🚀
🤩 🤖 Wassenger is a complete API solution for WhatsApp. Sign up for a 7-day free trial and get started in minutes!
We’ll show you another example of using this feature, which you can link with more automation to take your business to the next level.
With Wassenger and Make, automating your customer interactions on WhatsApp has never been easier. By integrating these powerful tools, you can save time and enhance customer engagement while focusing on growing your business. ⚡
Ready to take the next step? Register now on Wassenger to start automating your WhatsApp messages and explore all the possibilities Make has to offer for your business. 🏆
🌟 Don’t miss the chance to elevate your customer communication and start today with Wassenger! 🚀