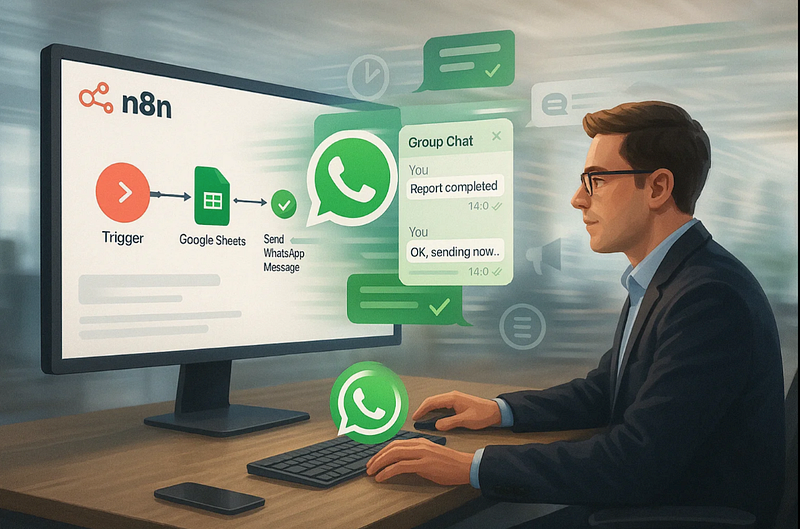
In this tutorial, you’ll learn how to send automated messages to WhatsApp groups using n8n, a no-code workflow automation platform, and Wassenger, a versatile WhatsApp API solution. Automating and scheduling messages to WhatsApp groups can save time and help you reach your audience at scale — whether for notifications, announcements, or marketing.
🤩 🤖 Wassenger is a complete API solution for WhatsApp. Sign up for a 7-day free trial and get started in minutes!
Why Automate WhatsApp Group Messages?
- Efficiency: Send messages to multiple groups with a single automation.
- Consistency: Ensure your audience receives timely and uniform updates.
- Scalability: Ideal for businesses, community managers, or event coordinators managing large audiences.
Prerequisites
Before starting, ensure you have:
- An n8n account (cloud or self-hosted). Learn how to self-host n8n here
- A Wassenger account with a connected WhatsApp number.
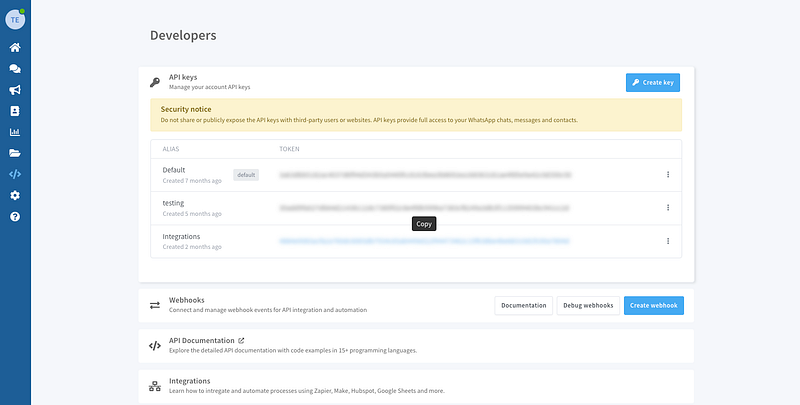
- Your Wassenger API key (find it in the Wassenger dashboard under API Keys).
🤩 🤖 Wassenger is a complete API solution for WhatsApp. Sign up for a 7-day free trial and get started in minutes!
Step-by-Step Guide
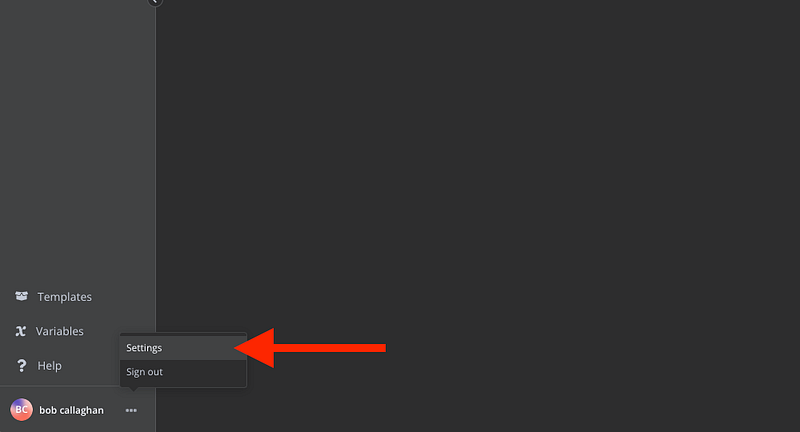
1. Install the Wassenger App in n8n
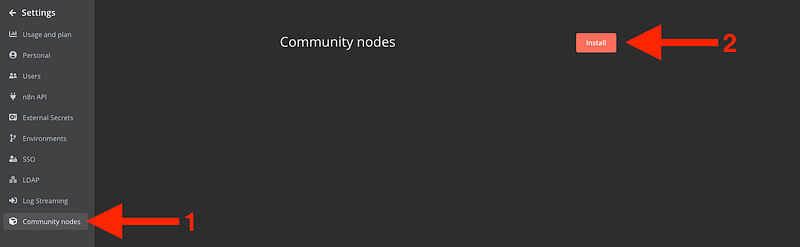
Community Nodes
- Go to Settings > Community Nodes
2. Select Install
3. Enter n8n-nodes-wassenger in the "Enter npm package name" field
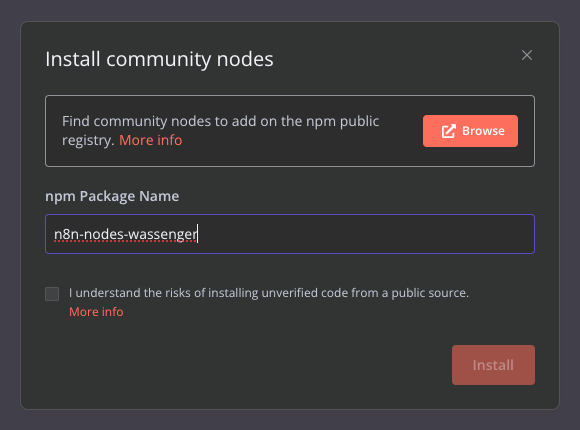
4. Agree to the risks of using community nodes: select “I understand the risks of installing unverified code from a public source”
5. Select Install
6. You can now use Wassenger’s node in your workflows: if you can’t see it, restart the n8n instance
🤩 🤖 Wassenger is a complete API solution for WhatsApp. Sign up for a 7-day free trial and get started in minutes!
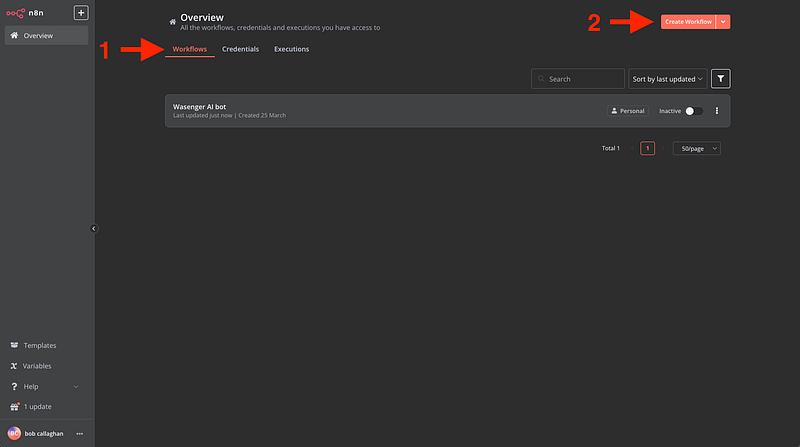
2. Create a New Workflow
Within the n8n interface, go to ‘Workflows’ and click ‘Create Workflow’
🤩 🤖 Wassenger is a complete API solution for WhatsApp. Sign up for a 7-day free trial and get started in minutes!
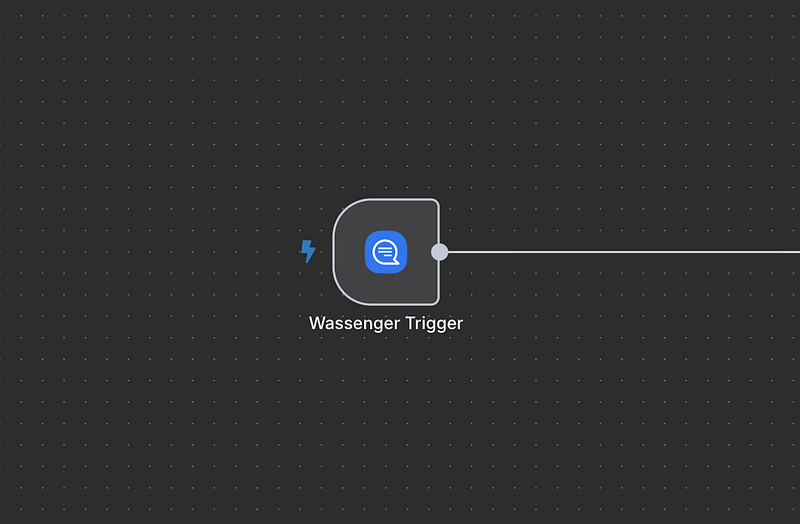
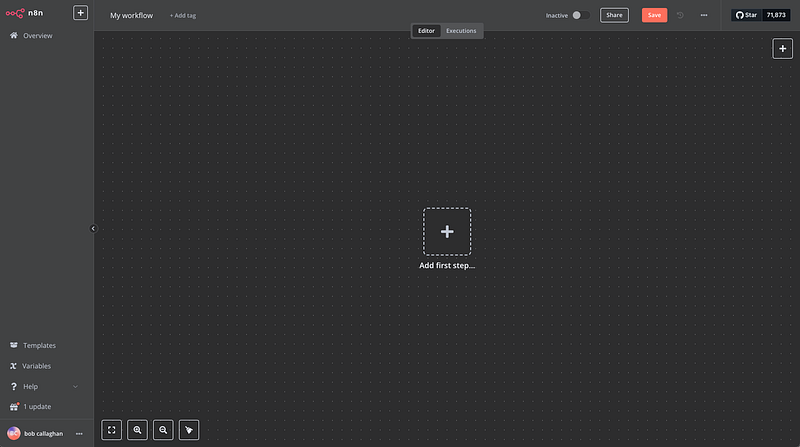
3. Connect the Wassenger Trigger
Okay, now that we are inside our new Workflow, we are going to create the connection with Wassenger in the following way:
Click on ‘Add first step’
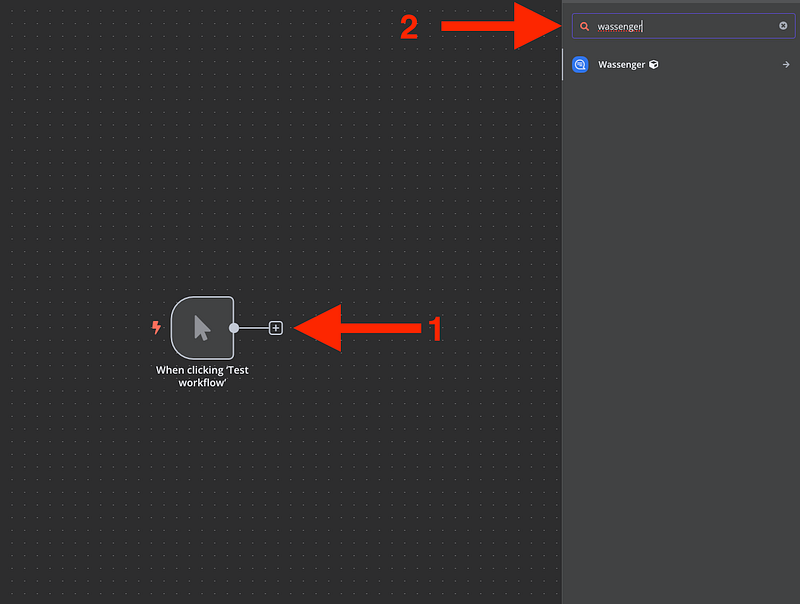
Then search for “Wassenger”. Remember, you need to install the Wassenger node first. If you haven’t done it yet, check out our related article here.
Add a “Manual” trigger node by clicking the “+” button and selecting “Manual”. This lets you test the workflow manually before automating it.
4. Add the Wassenger Node
- Click the “+” button to add a new node.
- Search for “Wassenger” in the node search bar and select it.
- In the Wassenger node, choose the “Send a Text Message” action. This action supports sending messages to group chats via Wassenger’s API.
Then, we search for ‘Send multimedia message’. In this tutorial, we will send an image with a caption, but you can send a simple text message if you want to by selecting ‘Send text message’. In upcoming tutorials, we will explain how to send Polls, Meeting events, scheduled messages, and contacts.

🤩 🤖 Wassenger is a complete API solution for WhatsApp. Sign up for a 7-day free trial and get started in minutes!
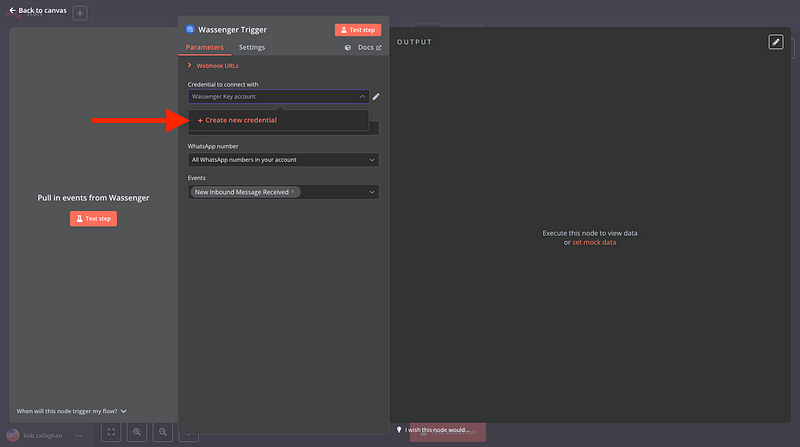
5. Configure Credentials
- In the Wassenger node, click the “Credentials” dropdown and select “Add new”.
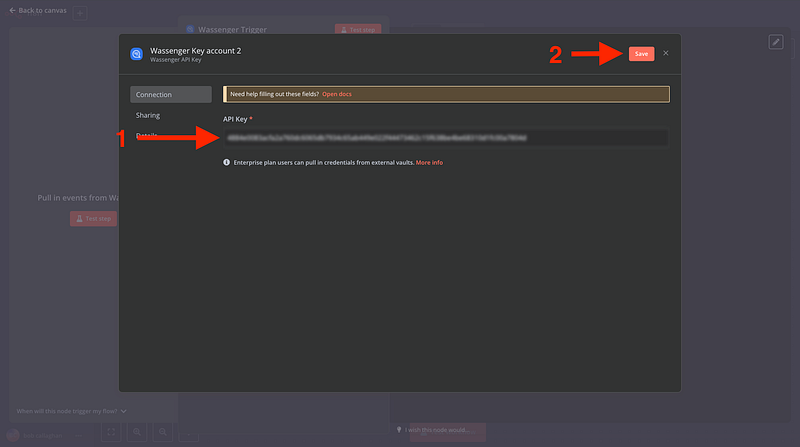
- Enter your Wassenger API key (copied from the Wassenger developers section) and click “Save”.
- Link these credentials to the node.
- Go to the API key page in Wassenger and copy the given API key or create one
2. And copy it into the n8n trigger
🤩 🤖 Wassenger is a complete API solution for WhatsApp. Sign up for a 7-day free trial and get started in minutes!
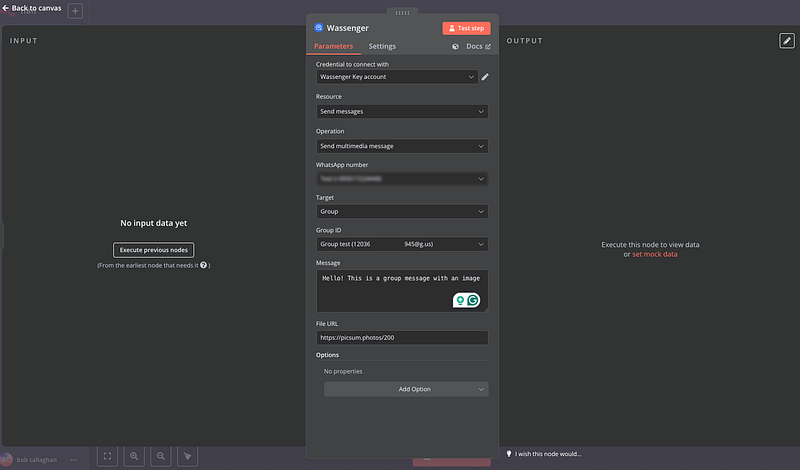
6. Set Group ID and Message
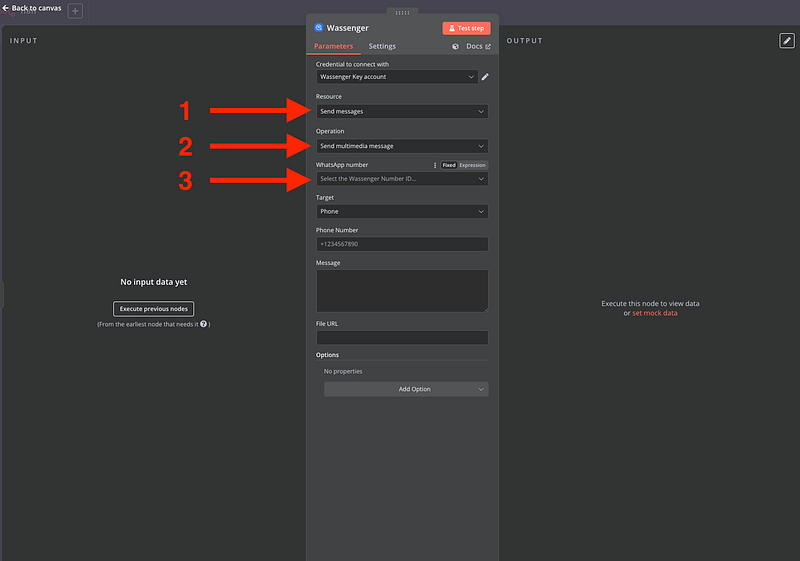
- Select ‘Send message’ in the Resource field
- Select ‘Send multimedia message’ in the Operation field
- Select the WhatsApp number connected to Wassenger you want to send your message from
Now, select the target of your message. In this case will be a group, but you can select a Channel or single chat

Now create your message and add the picture URL
Tip: Ensure your WhatsApp number is online in Wassenger (check the dashboard) to send messages successfully.
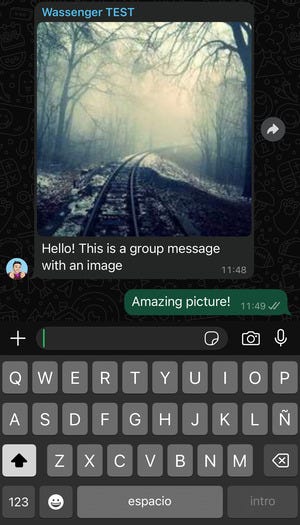
7. Test the Workflow
- Save the workflow by clicking the “Save” button.
- Click “Execute Workflow” in n8n to run it manually.
- Open the specified WhatsApp group on your phone or WhatsApp client to confirm the message was sent.

8. Customization and Next Steps
Once your basic automation works, enhance it with these options:
- Dynamic Messages: Connect nodes like “Google Sheets” or “HTTP Request” to pull data and personalize messages (e.g., “Hello {{name}}, here’s your update!”).
- Scheduling: Replace the Manual trigger with a “Schedule” node (e.g., daily at 9 AM) for recurring messages.
- Error Handling: Add an “If” node to check for errors and retry failed sends.
🤩 🤖 Wassenger is a complete API solution for WhatsApp. Sign up for a 7-day free trial and get started in minutes!
Upcoming Tutorials:
Stay tuned for in-depth guides on these topics and more! We’ll cover:
- Creating dynamic messages with real-time data.
- Importing contacts from Google Sheets for automated group management.
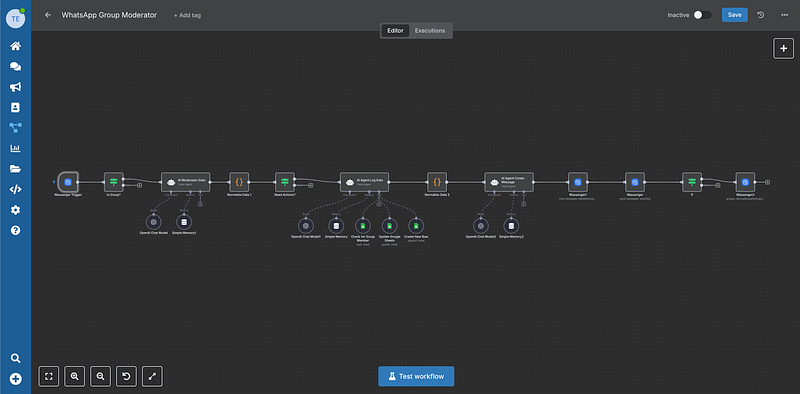
- AI group management and moderation using ChatGPT
- Advanced error handling and workflow optimization.
Subscribe to our newsletter or follow us on social media to be notified when these tutorials are released.